How to set up the hardware
Please follow the wiring shown on the photo below. There are two connections to the micro:bit, one is on the GND connector (the yellow cable on the picture), the other is on PIN0 (the white cable on the picture).
The Neopixels get their power from a battery pack, as they may draw too much current to be run via the USB interface and the micro:bit. The battery holder is made for 4 or 6 batteries. As we can only use 3, the missing battery is replaced with a wire (the green cable) in case of the holder for 4 batteries. The 3 batteries supply 4.5V, this is sufficient and safe, 4 batteries with 6V may destroy the Neopixels! The seconc photo below shows the wiring scheme with the battery holder for 6 batteris, again we only put in 3 batteries.


How to start coding Neopixels with MakeCode blocks
Here are some links for you if you want to code the Neopixels with MakeCode Blocks. There is a nice tutorial here. If you want to start by yourself, launch the web editor here, create a new project, then go to Advanced/Extensions/neopixel to download the blocks to control the Neopixels. Here is a simple example project, the block “Pick random 0 to 255” at the bottom needs to be entered for red, green and blue each, so three times!
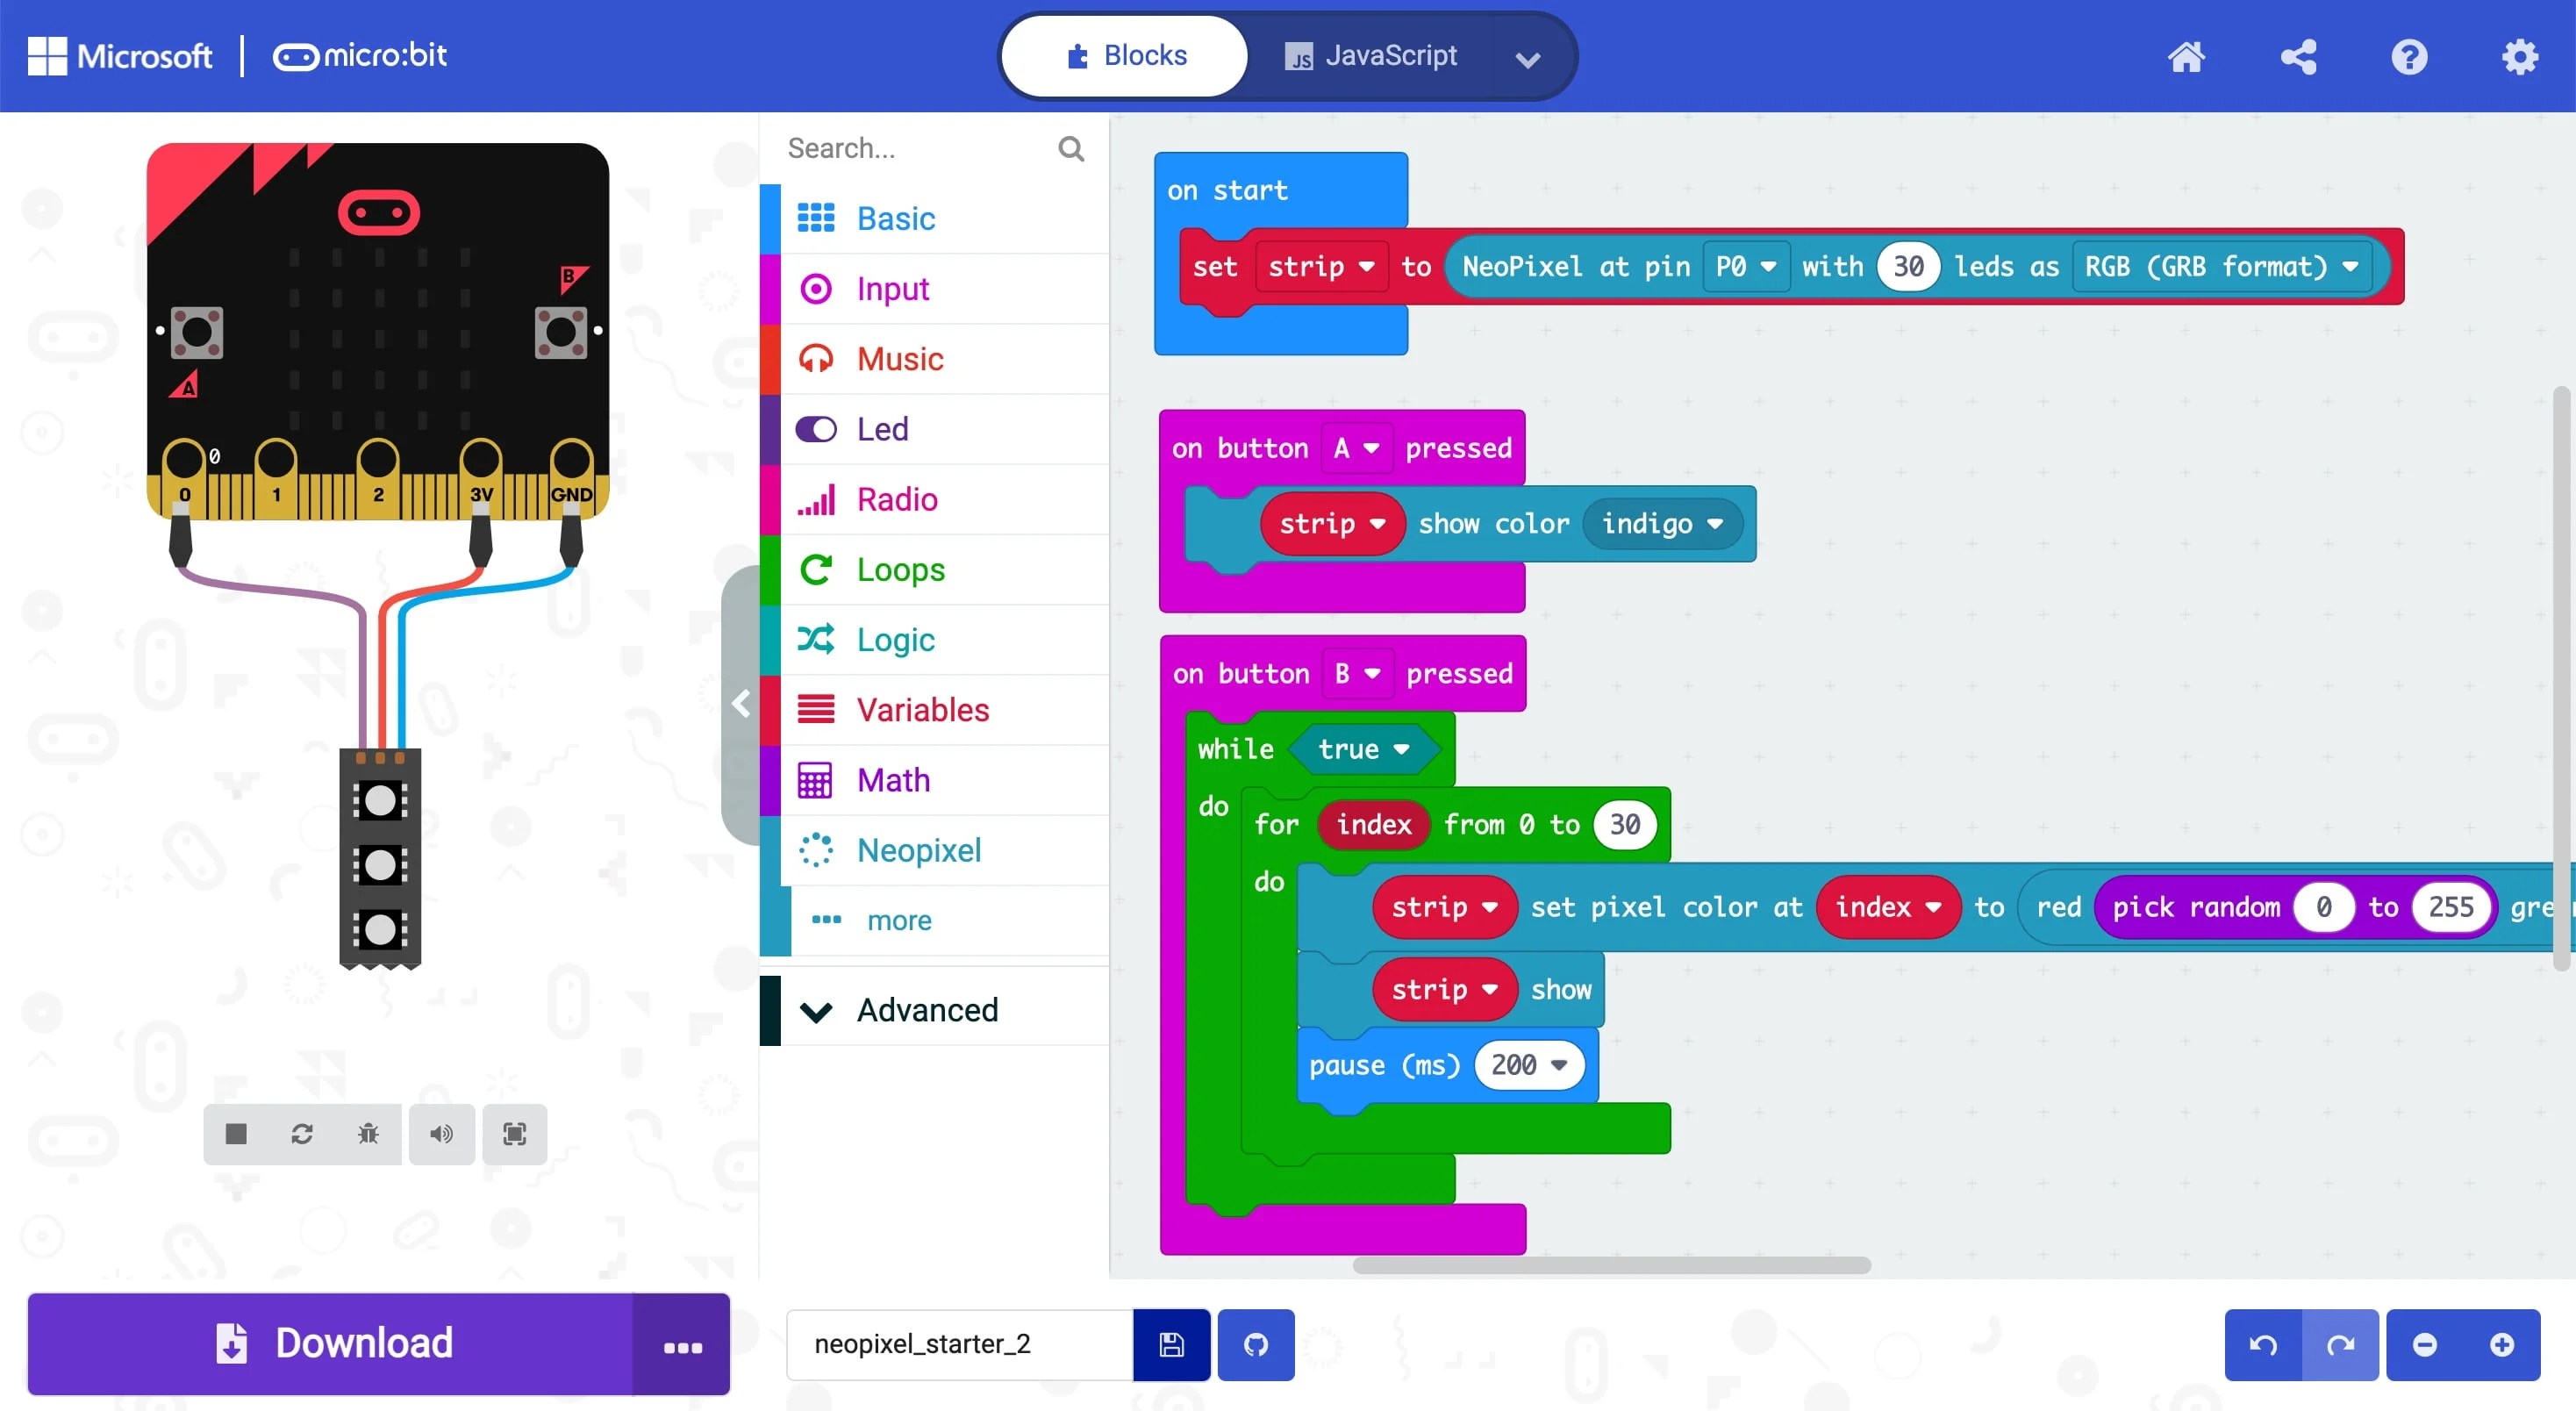
Here is another Makecode program that runs a rainbow on the 30 LED Neopixel stripe. You may notice that the for loop is different, it was wrong in the example above and is correct in the new code (why? Hint: How many LEDs do we have available on the stripe, how many do we count through in the for loop?)
The program uses a different colour encoding than the RGB (Red, Green, Blue) system we used so far. It is called HSL encoding and uses the three values Hue [0..360], Saturation [0..100] and Lightness/Luminosity [0..100]. The values inside the square brackets show the range the three parameters are allowed to have, see also the website here to play around with the parameters. For simplicity, change only the values of Hue in the given range and choose Saturation = 100 and Lightness = 50 to get bright and shiny colours.
In order to try out you code, you can actually run it in the simulator. This does even work for the stripe of 30 LEDs. It is good practise (and saves time) to test with the simulation first. When your code runs flawless there, upload it to the micro:bit and see it there in all its glory.

Here are some Micropython code snippets to upload, try out and modify to your liking.
You need to start a web browser and go to micro:bit to copy and paste the code below. Then press “Download” to create an executable file with the extension .hex. You find this file in your download folder. Next connect the micro:bit to an USB port and make sure that you see the micro:bit as a drive in the File Explorer. Then drag and drop the file onto the micro:bit drive icon. The yellow LED on the micro:bit will start to flash. If the program is correct, the program will start to run once the yellow LED lights up steadily. Otherwise you will get error messages with line numbers on the LED matrix of the micro:bit. Once you have fixed the errors, download again.
This first example changes the colour of the Neopixels one after another and leaves each pixel on until it is refreshed in a different colour.
[code language="python"]
"""
Repeatedly displays random colours onto the Neopixels.
Works for Neopixel strips of 30.
"""

from microbit import *
from neopixel import NeoPixel
from random import randint

# Setup the Neopixel strip on pin0 with a length of 30 pixels
np = NeoPixel(pin0, 30)
while True:
   #Iterate over each LED in the strip
   for pixel_id in range(0, len(np)):
      red = randint(0, 60)
      green = randint(0, 60)
      blue = randint(0, 60)
      # Assign the current LED a random red, green and blue value between 0 and 60
      np[pixel_id] = (red, green, blue)
      # Display the current pixel data on the Neopixel strip
      np.show()
      sleep(100)
[/code]
Here is another example with a different lighting pattern:
[code language="python"]

"""
Adafruit example, modified to run with 30 LED strip.
see at
https://learn.adafruit.com/pages/11472/elements/2981640/download
for the basic version with one running neopixel
180815 Modified the original version, but not yet debugged.
181001 Debugged and running!
"""

from microbit import *
from neopixel import NeoPixel

num_pixels = 30
foreground = [255, 0, 0] # Int color - red, green and blue
foreground2 = [0, 255, 0]
background = [16, 16, 16]

ring = NeoPixel(pin0, num_pixels)

while True:
   # red/green dot circles around a white background (for 30 neopixel strip)
   for i in range(0, num_pixels-1):
      ring[i] = foreground # set pixel i to foreground
      ring[i+1] = foreground2
      ring.show() # actually display it
      sleep(50) # milliseconds
      ring[i] = background # set pixel to background before moving on
      ring[i+1] = background
      ring.show()
      # implement the closing of the circle for last and first element.
      ring[num_pixels-1] = foreground
      ring[0] = foreground2
      sleep(50)
      ring[num_pixels-1] = background
      ring[0] = background
[/code]
ATTENTION: This code snippet uses the concept of a block of code. The lines in a block of code belong together, here they are inside loops starting with while and for … Everything inside the loop is repeated. In order for the interpreter to see where the blocks begin and end, each line inside is indented by four/eight spaces. The website may not show this properly. When copying the code over to your editor, please make sure that these lines remain indented.
Here you find the full documentation for the micro:python language with the micro:bit. The particular link brings you to the documentation for the Neopixel library.
Leave a Reply